Post-Harvest Analysis with FieldView™
Overview
Once you have planting and harvest data in the FieldView™ platform, you can use our analysis tools to evaluate your on-farm decisions and gain insights that help plan for the future.
How to Access Post-Harvest Reporting
DATA QUALITY CHECK
Before you begin analyzing data, confirm all your data has offloaded from your FieldView™ Drive, the data is within the field boundary and that all hybrids/varieties are named correctly. Utilize the Fix-It Tool to correct these issues.
The processes below take place on the FieldView™ app and FieldView Cab
app:
OFFLOAD STATUS
- In FieldView Cab app, connect to the FieldView Drive, then go to Map >
(top right corner) > Offload Status, or go to Settings > Devices > Edit > Offload Status.
- If Offload Status reads anything other than 100%, ensure FieldView Drive and iPad device remain connected until offload status reads 100%.
FORCE A CLOUDSYNC
- On the Home screen, click Data Status > Sync Data to Cloud.
- Navigate to Help > CloudSync Status > CloudSync Log (at bottom). Look in the CloudSync Log Status column for a successful sync as the most recent item.
POST-HARVEST YIELD ADJUSTMENT
- Select Dashboard tab
- Tap on the Yield Analysis card
- Select the field you want to adjust
- Tap the three dots in the upper right corner
- Select Adjust Field Yield
- Make any necessary adjustments > Save
- Click Apply
NOTE: Changes do not impact raw data files.
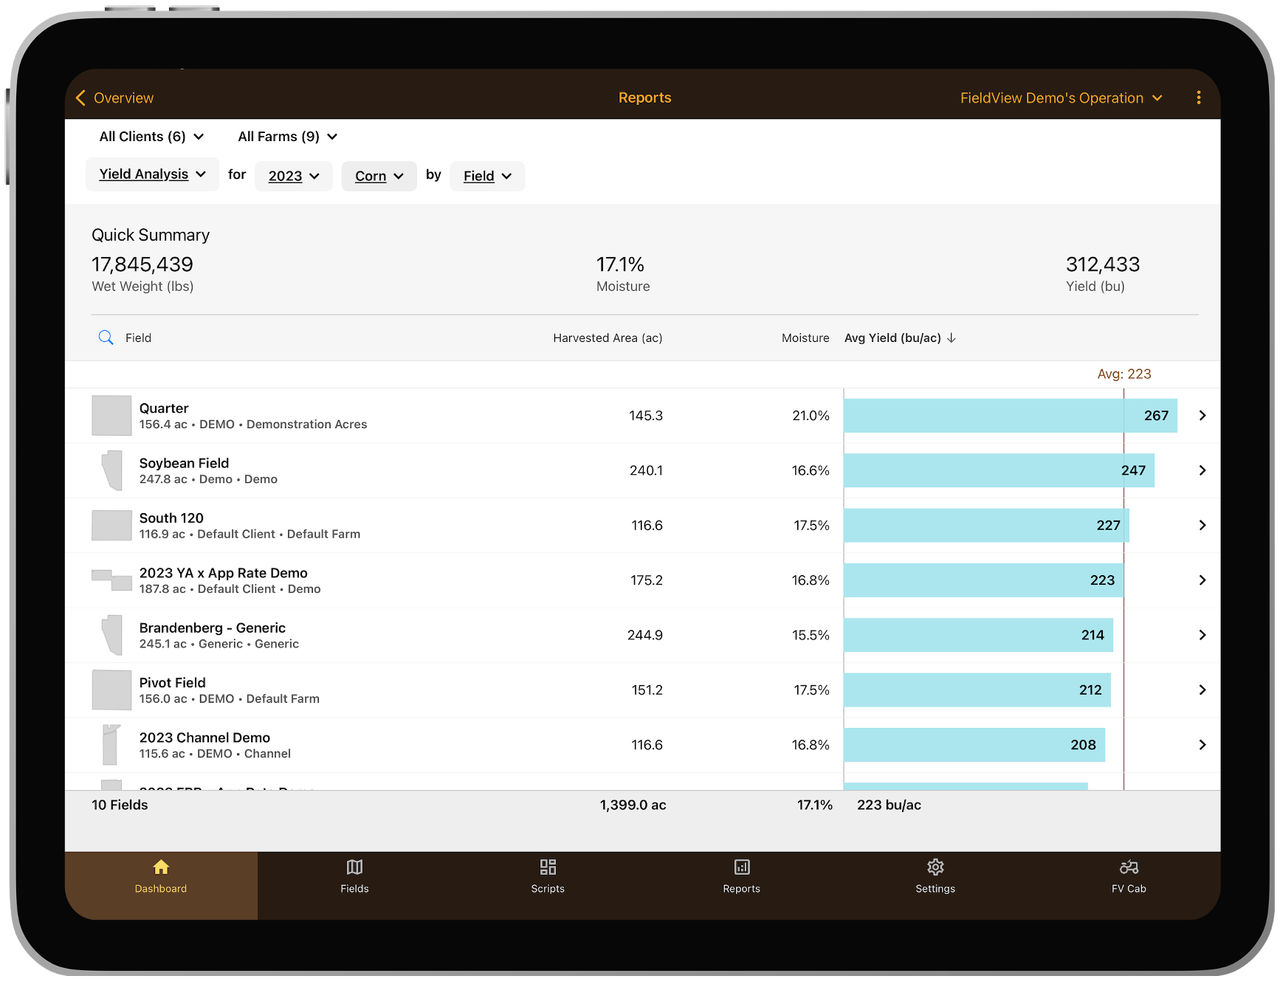
YIELD ANALYSIS
- Select Dashboard tab
- Tap on the Yield Analysis card
- Confirm the correct operation is selected, as well as crop and year
- Choose to filter data by Field, Hybrid/Variety, Seed Treatment, Date Harvested, Combine, or Soil (if available in your geography) drop-down
- Sort data by Field Name, Harvested Area, Moisture, or Avg. Yield
- Tap any row to dig into more detail
- Create a PDF/CSV report to share/print by tapping the three dots in the upper right corner
FIELD REGION REPORT
- Tap Fields tab, then select field of interest
- Tap Field Region Report button
- Select Freeform, Polygon, Pivot, or Rectangle
- Draw region with finger
- Tap Add a note, add title, photo, and notes
- Identify region as seasonal or permanent
- Select a color for the region outline and add tags
- Tap Report to go back, then Save
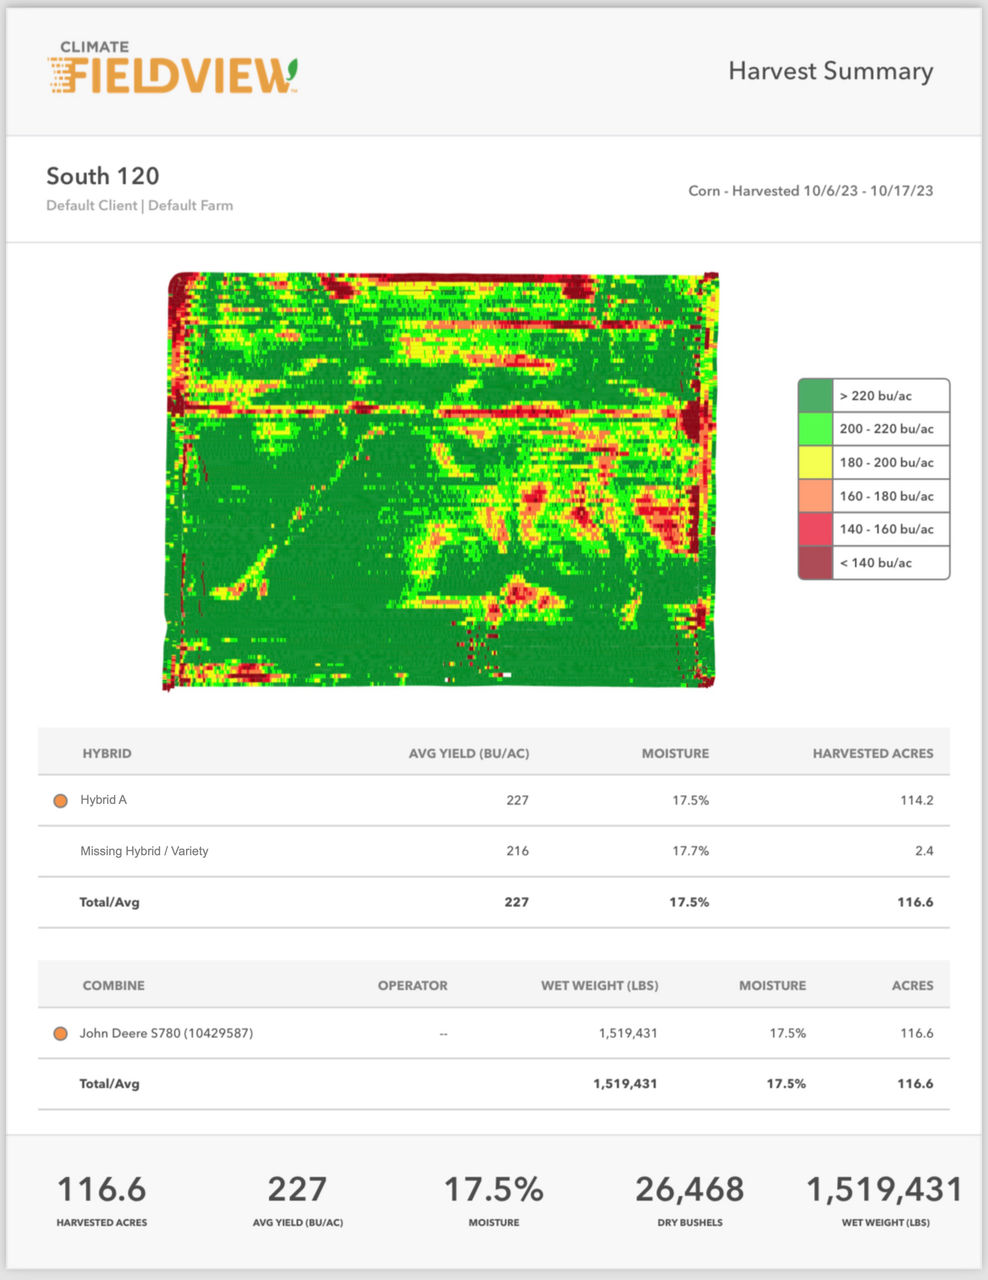
HARVEST SUMMARY REPORT
- Select Field, Season, & Harvest tab
- Tap the More button
- Tap Harvest Summary
- Tap Create Map PDF
- Select Email/Print
- The Email/Print button allows the PDF to be emailed, printed, or shared using another iOS™ app
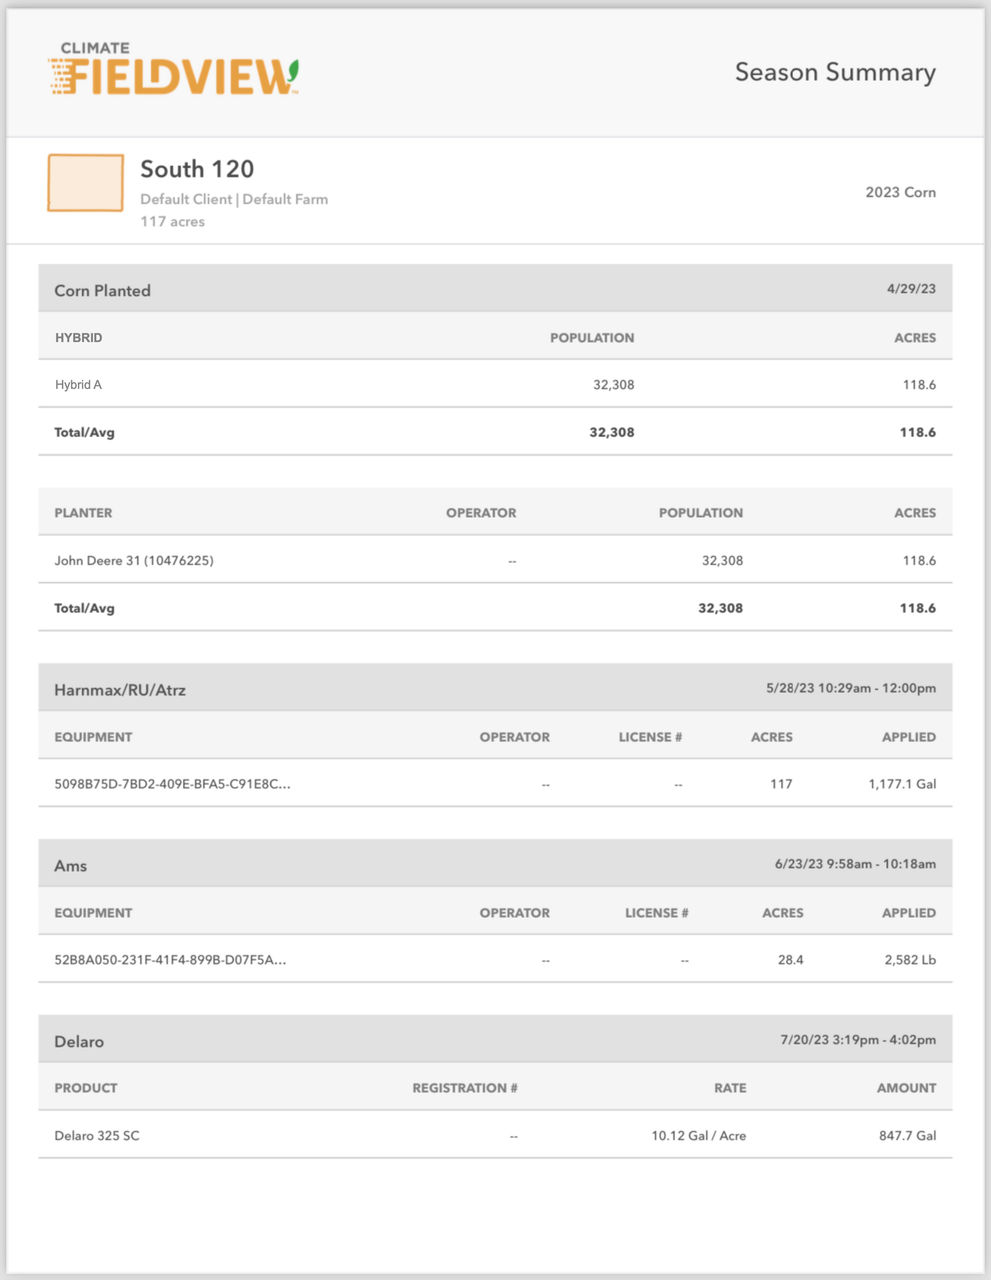
SEASON SUMMARY REPORT
- Open Field
- Tap the More button
- Select Season Summary
- Tap Create PDF to share report
- Select Email/Print
- The Email/Print button allows the PDF to be emailed, printed, or shared using another iOS™ app
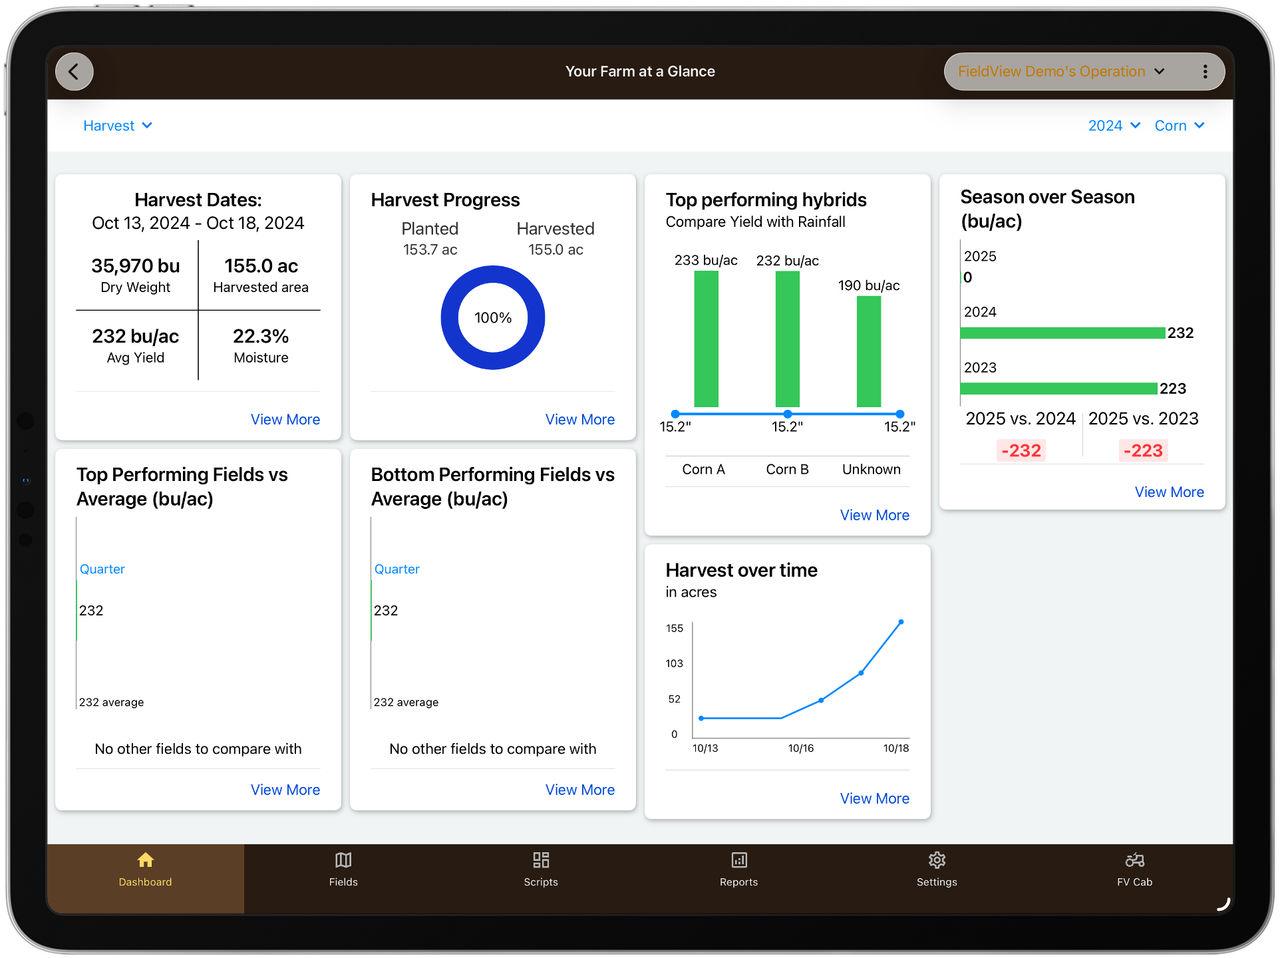
YOUR FARM AT A GLANCE
- Navigate to the Your Farm at a Glance tile on the Overview screen
- Tap View More
- Select Harvest from the drop-down in the top left corner
- The Harvest page allows users to:
- View top performing hybrids while comparing yield to rainfall totals
- Compare season over season yield over various years
- Track top and bottom performing fields
- View harvest progress
- View harvest over time
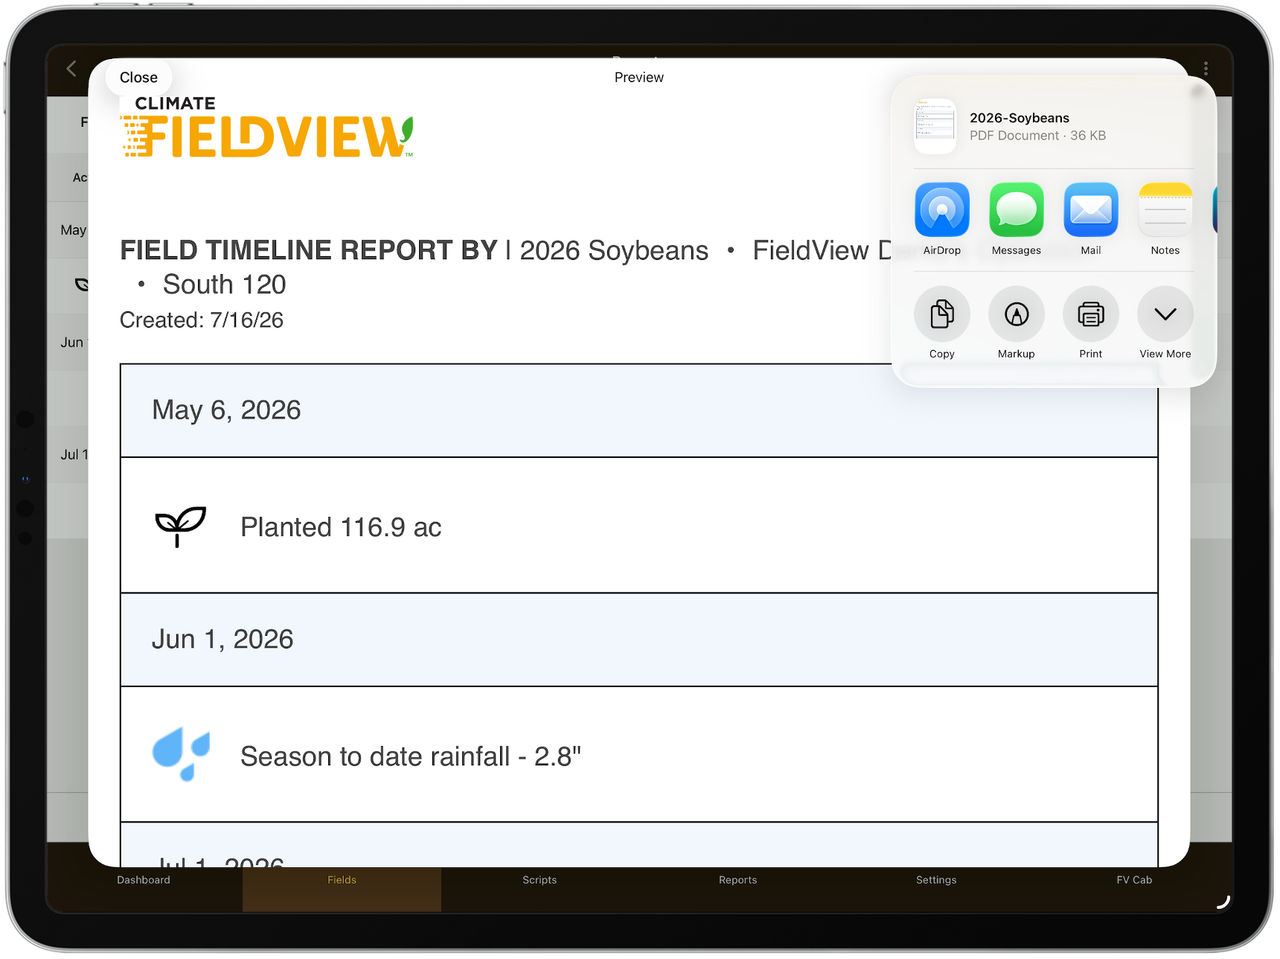
FIELDVIEW TIMELINE
- From the Fields tab, select desired field and crop year
- Tap FieldView Timeline on the side panel
- This page provides a timeline of events that occurred within a single field over the course of a growing season
The processes below take place on FieldView.com:
ZIPPING A DATA FILE ON A PC
- Locate the data file(s)
- Right click on the file or folder
- Hover cursor over Send To option
- Select the Compressed (zipped) folder
- The new compressed/ zipped folder will appear on your desktop
ZIPPING A DATA FILE ON A MAC
- Locate the data file(s)
- Right click on the file or folder you would like to compress and select Compress "name of file"
- The new compressed/zipped folder will appear on your desktop
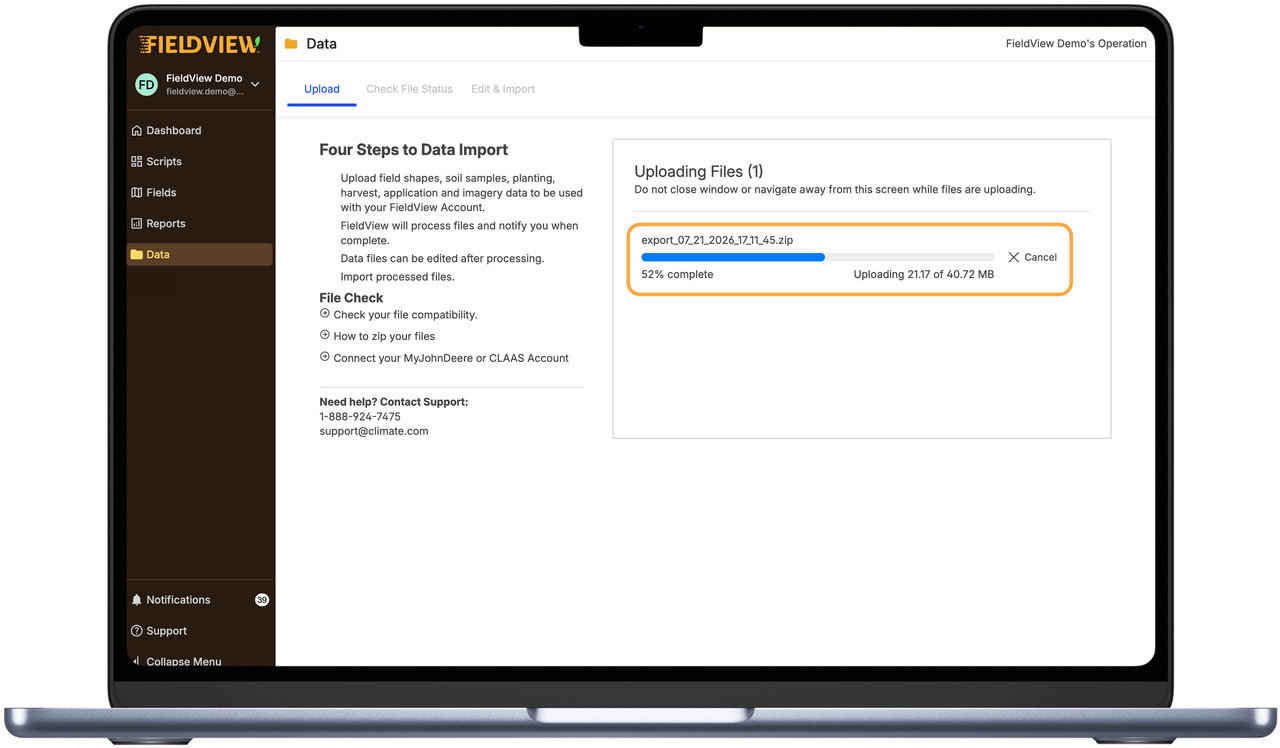
IMPORTING DATA INTO FIELDVIEW
- Click on the Data tab, then select Upload & Import
- Select Browse for Files > select files for upload
- Navigate to the Edit & Import tab
- Select files for import > Actions > Import files
- Go to iPad® device, open FieldView™ Cab app, CloudSync
- Go to FieldView app, FieldView Cab app, or FieldView.com to view map layers
FIX CROP or HYBRID DATA
- Click on the Data tab > Fix
- Select the type of data you would like to edit (Planting or Harvest)
- Select the year
- Select field(s) to edit, then click Edit
- Select Crop or Hybrid
- Identify original data, select new data, then tap Replace
- Review changes in green, then select Apply Changes
DELETE A FIELD LAYER
- Click on the Data tab > Fix
- Select the data you would like to delete (Planting or Harvest)
- Select the year
- Select field(s) to edit
- Click Delete
- Confirm action to delete, select Continue
NOTE: THIS ACTION CANNOT BE REVERSED!
SPATIALLY REPROCESS A FIELD
- Click on the Data tab > Fix
- Select the data you would like to edit (Planting or Harvest)
- Select the year
- Select field(s) to edit
- Click Reprocess Spatially
- Select Continue
- Click Data > Upload & Import to access Data Inbox
- Review the Field assignment for the files and make any necessary changes
- Select the files and import back into your account with the now correct field assignment
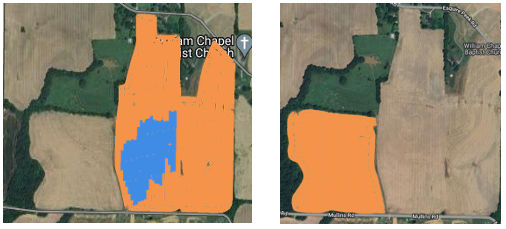
Example of Data Mapped in the Wrong Field:
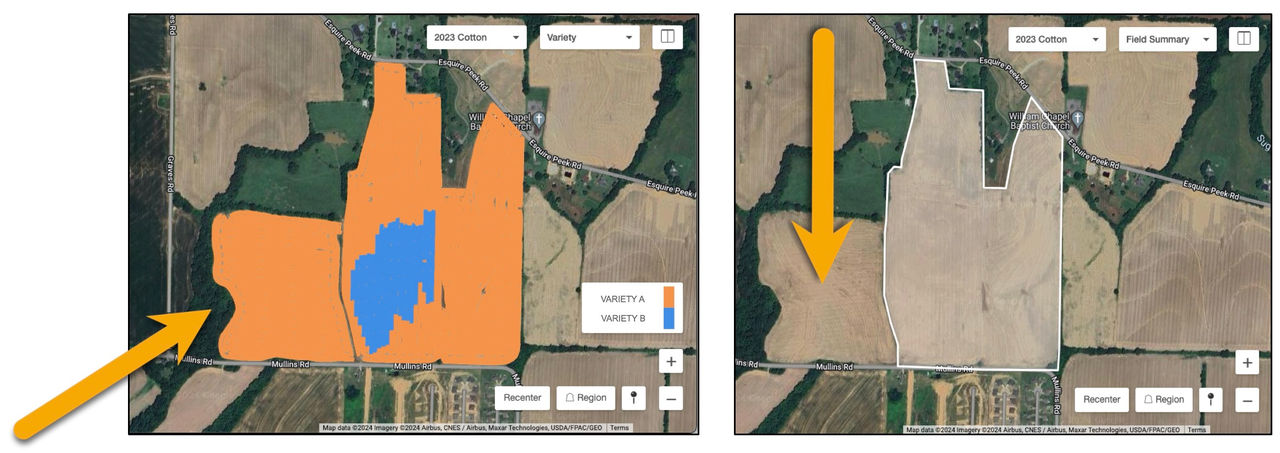
Example of the data once it has been reprocessed spatially and is now showing in the correct field: